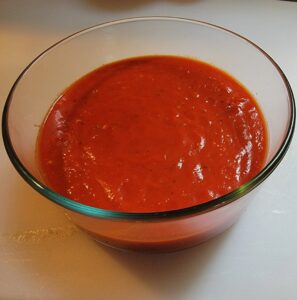
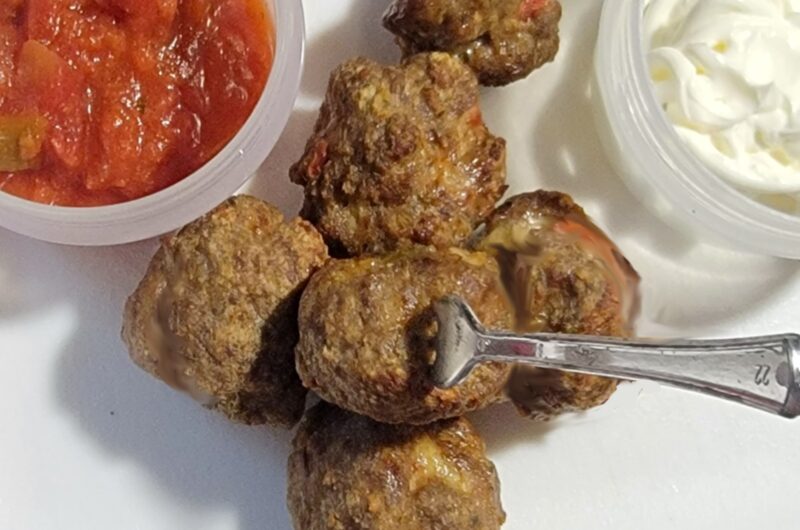
Uncategorized

Appetizers, Meat, Uncategorized

Taco Meatballs

Taco Meatballs In the Air Fryer

Recipe by Sheri Tomato

Spicy, delicious meatballs you can use so many ways. Put them in a hoagie. Put them on top of a salad with a little salsa and sour cream. Serve them on a party platter with toothpicks and individual dip cups. Very easy recipe. You can serve them immediately or freeze them to use in a pinch when you need to serve up an appetizer quick. And of course, they are always great to add to a spaghetti sauce. Who needs frozen meatballs from the supermarket when you can make your own.

Ingredients

  • 1 lb ground beef

  • 2 eggs

  • 1/4 cup salsa

  • 1 tsp paprika

  • 1 tsp cumin

  • 1 tsp salt

  • 1 tsp pepper

  • 1/2 tsp garlic powder

  • 1/2 tsp onion powder

  • 1/2 tsp crushed red pepper

  • 1/2 tsp Italian seasoning

  • 1/2 cup seasoned bread crumbs

Directions

  • Break up ground beef in large bowl. Add eggs and salsa. Combine well.
  • Add in the seasonings and breadcrumbs. Mix until everything is thoroughly combined.
  • Shape each meatball into the size of a golf ball. You should end up with about 20 meatballs.
  • Place your meatballs in a single layer in your air fryer, with none of them touching each other. Depending on the size of your air fryer, you may have to work in batches. Cook at 375 degrees Fahrenheit for 10 -15 minutes until they are browned and reach an internal temperature of 160 degrees Fahrenheit.

 
Doughs, Uncategorized

Three Pepper Cheddar Cheese Bread

Three Pepper Cheddar Bread Scratch Cooking

Recipe by Sheri Tomato
Cooking time

45

minutes

Delicious, crusty bread made from scratch. The cheddar cheese and three types of pepper give it a great artisan style look and flavor. Your guests will love it!

Ingredients

  • Yeast Mixture
  • 1 1/3 cup very warm water

  • 2 1/4 tsp active dry yeast

  • 2 tsps sugar

  • Dry Ingredients
  • 3 cups Unbleached bread flour

  • 2 tsps salt

  • 1/4 tsp garlic powder

  • 3 tsp ground chia seeds (optional)

  • Bread Filler Ingredients
  • 1 cup cheddar cheese

  • 2 each jalapeno peppers, diced

  • 2 each banana peppers, diced

  • 1 each red bell pepper, diced

Directions

  • In kitchen aid mixing bowl, combine water, yeast and sugar. Let sit for 5 - 10 minutes to proof. Bubbles should form. If the water mix doesn't get foamy; the yeast is no good. Discard and start over with new yeast.
  • In a separate bowl, mix together flour, salt, chia seeds and garlic powder.
  • Using dough hook attachment for the kitchen aid mixer, add flour mixture, 1 cup at a time into the foamy yeast water until all of the flour is incorporated. Dough should be slightly sticky.
  • Cover the mixing bowl tightly with Saran Wrap. Place a kitchen towl over the wrapped bowl and let the dough rise in a warm place till dough has doubled in size (about 2 hours).
  • Place dough on a lightly floured surface. Add the chopped peppers and shredded cheddar cheese a little at a time, stretching and folding the dough over and over until all of the peppers and cheese are thoroughly combined. Form the dough into a ball.
  • Place the dough ball on a large sheet of parchment paper. Cover loosely with plastic wrap and kitchen towel. Let rise for 1 hour.
  • In the meantime, place lid on Dutch oven and place the Dutch oven pot on a lower rack of the oven. Preheat oven to 450 degrees Fahrenheit with the pot in the oven.
  • Once the oven is preheated and dough has completed its second rise, using oven mitts, take the Dutch oven out of the oven and remove the lid. Caution, it will be very hot.
  • Make a few horizontal cuts in the top of the dough with a sharp knife. Taking both ends of the parchment paper, carefully transfer the dough to the Dutch oven, keeping the parchment paper under the dough.
  • Trim the parchment paper so that no paper is overlapping the top of the Dutch oven. Place the lid back on the Dutch oven and return it to the oven.
  • Bake for 30 minutes. Remove lid and cook for an additional 20 - 30 minutes, till bread is a light golden color. Remove the pot from the oven.
  • Carefully take both ends of the parchment paper and move the bread out of the pot and onto a cooling rack.
  • Let the bread cool for at least 30 minutes before cutting into it.

Notes

  • Once the bread has cooled, store the unused bread in a sealed container or plastic bag. There are no preservatives in this bread so please use it up within 3 days.
 
Meat, Uncategorized

How To Cook Bacon In The Oven

Who doesn’t love bacon? The smell of it cooking, the crispy texture, the wonderful taste of it on a sandwich, or in a salad, or just on it’s own. Bacon, bacon, bacon. Let’s make some bacon in the oven.

Why in the oven? It doesn’t make a mess, you can make more at a time, and it always comes out perfect.

Bacon Cooked In The Oven

Recipe by Sheri Tomato
Prep time

5

minutes
Cooking time

30

minutes
Total time

35

minutes

Ingredients

  • 1 lb Sliced Bacon

  • Baking sheet

  • Aluminum Foil

Directions

  • Line your baking sheet with aluminum foil.
  • Lay your bacon in a single layer on the prepared baking sheet.
  • Place it in a cold oven. This is very important. Do not preheat oven.
  • Once bacon is in the oven, turn the oven on to 450 degrees Fahrenheit.
  • Cook for 30-40 minutes.
  • Not all ovens are created equally, so start peeking after 25 minutes. Remove it from the oven when the bacon has reached your desired doneness.
  • Note - They say you don't need to flip bacon when you are cooking it in the oven, but I can't help myself. I usually flip it once, halfway through the cooking time.
 
Meat, Uncategorized

Ground Beef Taco Meat Recipe You’ll Cook Again and Again

I always keep a batch of taco meat in my freezer. It is such a versatile dish.

You can more than just tacos or burritos. Who doesn’t love a rice taco bowl, or a taco salad, or taco eggrolls.

This is one of my favorite taco meat recipes. I always make a double batch. Eat some, save some.

Really Easy, Tasty Taco Meat

Recipe by Sheri Tomato

Ingredients

  • 1 lb ground beef (I like 85/15)

  • 1 tsp chili powder

  • 1 tsp ground cumin

  • 1 tsp salt

  • 1 tsp pepper

  • 1/2 tsp garlic powder

  • 1/2 tsp onion powder

  • 1/2 tsp crushed red pepper flakes

  • 1/4 tsp oregano

  • 1 1/2 cup water

Directions

  • Cook ground beef under med/high heat in frying pan, breaking the meat into small pieces as you stir. Cook until all meat has been browned.
  • Drain grease and return pan to stove.
  • Mix all of the spices together and add to meat. Combine well.
  • Stir in one cup of water. Heat till boiling, then turn heat down to med/low. Cook till all liquid is gone, stirring occasionally.
  • Done. So easy and tasty, too.
 
Meat, Uncategorized

Best of Both Worlds – Juicy Burgers with a Healthy Salad

There is nothing I love more than a juicy delicious hamburger. Yes, I know it’s not the healthiest of meals. That’s why I pile salad ingredients between the buns. 

I also add a teaspoon of turmeric into the ground beef, along with the other spices.

According to the Cleveland Clinic and many other sources, the spice turmeric can act as an antioxidant and has been credited with all kinds of other benefits including pain relief, improving memory, an antidepressent, antiinflamatory agent and also has been credited with lowering the risk of heart disease.

What more could you ask for in a burger?  Enjoy!

Wok Burger with Loaded Salad Toppings

Recipe by Sheri Tomato

Have the best of both worlds with this delicious burger cooking in it's juices at the center of the wok, then put it on a toasted bun with wonderful, healthy salad ingredients on the top and bottom. Yum.

Ingredients

  • 1 lb ground beef

  • 2 TB water

  • 1/4 tsp baking soda

  • salt and pepper, to taste

  • 1 tsp chipotle seasoning

  • 1 tsp turmeric

  • 3 each hamburger buns, buttered and toasted (in wok or air fryer

  • Salad Toppings
  • 1 cup Lettuce, cut into thin strips

  • 1 each English cucumber, sliced thin, with skin on

  • multicolored sweet peppers, deseeded and cut into thin rings

  • Ranch dressing

Directions

  • Break up ground beef in large mixing bowl.
  • In small bowl or cup, whisk together water and baking soda.
  • Mix water/baking soda combo into ground beef. Let sit 15 minutes in refrigerator.
  • Form into 3 burger balls.
  • Heat wok on medium high heat.
  • Place a ball in middle of wok. Flatten with heavy spatula.
  • Season with salt, pepper and chili seasoning. Let cook for 2 minutes or until bottom starts to brown.
  • Flip. Season other side. Let cook for 1-2 more minutes, until temperature reads 165 degrees Fahrenheit.
  • Remove from pan and repeat steps 6 -8 for other two burgers. Cover cooked burgers with aluminum foil to retain heat until all burgers are cooked.
  • Toast buttered hamburger bun in wok or air fryer until lightly browned.
  • Add lettuce and onions to bottom of bun. Place burger over lettuce. Top with peppers, cucumbers, ranch dressing, and of course, top of bun.
 
seasoned pizza dough
Uncategorized

My go-to Pizza Dough Recipe

Overnight pizza dough

Recipe by Sheri Tomato

Cuisine: Italian

Servings

4

servings

Prep time

30

minutes

Cooking time

40

minutes

Calories

300

kcal

This is my go-to pizza dough recipe. It is made in a stand mixer and rises overnight in the fridge. I like a thick crust pizza, but if you are a thin crust kind of person, you can divide the dough in half and make two thin crust 12″ pizzas.

Ingredients

  • 1 1/4 tsp active dry yeast

  • 1 tsp sugar

  • 1 1/3 cups very warm water

  • 2 TB olive oil

  • 2 cups cups unbleached all purpose flour (may need a little more or less to reach desired dough consistency).

  • 1 Cup 00 pizza flour

  • 1 TB salt

  • 1 tsp garlic powder

  • 1 tsp chia seeds (optional)

  • 1/4 tsp Dried basil

  • 1/4 tsp Dried Oregano

  • 1/4 tsp dried rosemary

  • 1/4 tsp Dried thyme

Directions

  • In a stand mixer, combine yeast and sugar. Gently pour water over the sugar and yeast, and then add the olive oil. Use whisk attachment to combine. Let sit 10 minutes to proof.
  • While your yeast is proofing, combine flours, salt, chia seeds, garlic powder, basil, oregano, rosemary, and thyme in a separate bowl. Mix thoroughly with a whisk for at least one minute.
  • After the ten minutes of proofing, your yeast mixture should have formed bubbles. If the mixture forms bubbles, proceed to step 4. If there are no bubbles, the yeast is no good. Toss and start over with fresh yeast.
  • Attach dough hook to your stand mixer. Add your flour mixture 1/2 cup at a time to your mixing bowl. Alternate between low and medium speed as you add the flour. Stop and scrape the dough from the hook and the sides of the bowl with a rubber spatula a few times during the mixing. This will ensure that all of the flour gets incorperated.
  • When dough is pulling away from the sides and just a little bit sticky, use your rubber spatula to gently transfer it to a lightly floured surface.
  • Form the dough into 2 smooth balls, about 16 oz each. Or for, one large, thick crust pizza, form into one ball. Roll the dough in the flour and fold it, repeating until the dough reaches the desired shape and texture. Add flour a little at a time, if necessary.
  • Place your dough balls into a lightly oiled containers that hasve an airtight lid. The oil should have a light oily film on the bottom and up the sides of the containers. The containesr should be more than twice the size of the dough balls, as the dough will double in size as it rises. Place one dough ball in each prepared container and roll the dough ball in the oil, so that the dough has a light coat of oil over the entire ball. Cover the containers with an air tight lid. Place the containers in a warm place for 1 – 2 hours or until dough has doubled in size.
  • After the dough has doubled, place your covered containers in the refrigerator overnight. This will enhance the flavor of your dough. Dough can be kept in the refridgerator for up to 3 days.
  • On the day you are ready to make your pizza, take dough out of refrigerator 2 hours beforehand and place (still inside closed container) in a warm spot for 2 hours to let it come to room temperature. It is then ready to use.

Notes

 
Eggs & vegetables, Uncategorized

Hard Boiled Egg Appetizer

There is so much you can do with a hard boiled egg.  Best off all, it can be made the night before and refrigerated for party day.  The appetizers above start with a simple boiled egg. Just layer in the lettuce,

hard boiled eggs

Hard Boiled Eggs

Sheri Tomato
When I need hard boiled eggs in a recipe, this is my go-to method. It cooks them perfectly every time.

Ingredients
  

  • 6 eggs
  • 1 tsp baking soda

Instructions
 

  • Gently place 6 eggs into a large pot on stove.
  • Pour cold water into the pot, being sure that the eggs are covered by at least 1" of water
  • Add one tsp of baking soda to the water.
  • Heat on medium high until water comes to a rolling boil.
  • Turn off burner and cover the pot with tight fitting lid.
  • Leave alone for 12 minutes.
  • Transfer eggs to a bowl of ice water.
  • Let your eggs sit in cold water for 10 minutes.
  • Eggs are done. Either use now or store in refrigerator for up to seven days.
Keyword eggs, hard boiled, basic